Governor’s New Clothes

Governor’s Clothes Documentation

The Governor Handout -updated

Attached (linked above) is the process documentation for creating the Governor’s new clothes (Jamestown project).  Carla Bauer, Tammy Jones, and I all worked on the garments, and tried to document as we went, but we had a hard and firm deadline; much was written after we were finished.  We really need to write the documentation for each part of the process such as the fingerloop braided trim, patterning, fabrics, etc.  There’s so much we could show for each part.

It was a fun project, and the three of us learned a lot in the process.


Fashion in Colonial Virginia

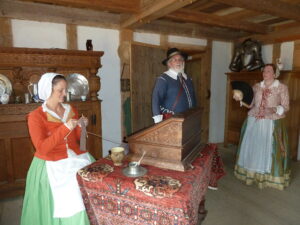
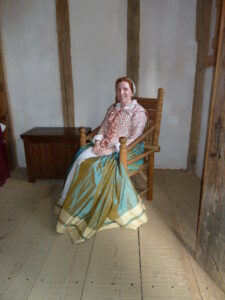
On Saturday, June 28th, Robert and Isobel, Christopher and Emma, and Alan and Jane descended on Jamestown Settlement’s Fort to volunteer for the day discussing fashion, clothing, and textiles to visitors, in addition to the history of the Fort.

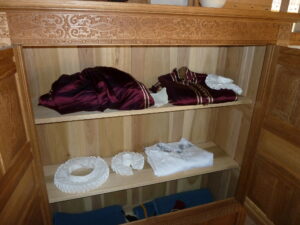
The Governor’s new clothes were on display, one set laid out on the Governor’s bed as if prior to getting dressed, and the fine silk suit folded neatly in the clothes press.


Emma, Robert, and Isobel stage and interpret in the Parlor and Hall of the Governor’s house.

A few more pictures of the day are available on Flickr.

Jamestown Shirt Addendum

A few more shots of the shirt closeup. Also a total on the number of hours: 74 over 3 months.

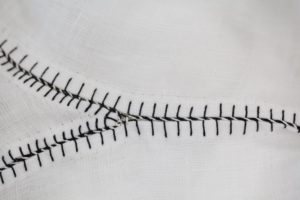
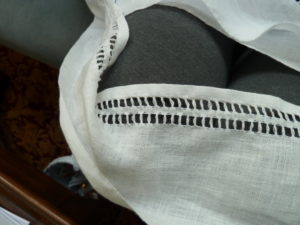
This is how the open work seam looks and another of the reinforcing stitch on the neck slit.

Open Work Seam


_MG_7733

Jamestown Shirt Done!

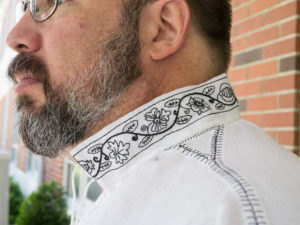
So Wednesday after 3 months of hand-sewing and embroidery, one of the Jamestown shirts is done!

Dye_130608_0009

Each piece was hemmed by hand with white linen hiding each raw edge. The pieces were then assembled using open work seams. This seam consists of a blanket stitch on the edge of each piece, buttonhole stitch just wider. Then the pieces are joined by stitching around the black silk on the blanket stitch with a white silk to join the pieces and create a decorative spiral look. This was based on examples from Janet Arnold’s Patterns of Fashion 4.

Dye_130608_0016


The neck was reinforced with a spider type stitched, based on examples from Janet Arnold.

Dye_130608_0019

The embroidery was stitched with a simple back-stitch and a reverse chain for the stems. A french knot was used for flower centers.


Dye_130608_0015

Finally the ties were finger woven using 5 loops into a square cord using white silk.

Dye_130608_0022


Materials used: Soie Perlee black silk and Gemstone white silk. The Au ver a Soie line is colorfast with washing while Gemstone silks will fade with time and washing in my experience. White linen thread and white linen fabric. I will post close up shots of the open work seams and embroidery later.

Dye_130608_0020


Pictures

We’re so busy, we haven’t had time to really sit down and write up much.  I have been taking pictures of construction and all, I just haven’t organized them into anything remotely coherent.  So, what you are getting is a picture update.

The burgundy suit is proceeding well, and we’re at the button holes and buttons phase with the doublet.  It took awhile to work out the best way to do the buttonholes on that shreddy fabric, but we’ve got it.  The pants are very close to the same state (whee!!!)  We’ll get pictures soon.

Carla has been busy working up a mock up of the pants for the green suit.  She’s made a pair of red linen pants that we’ll put in the shop to sell.  It’s turning out well, there are some tweaks that need to be made to the pattern.  The original was for a rather large man (50″ waist) so there’s some adjustments to be made.
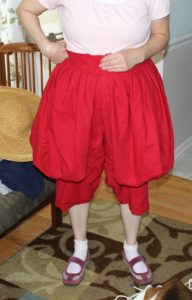
This is Carla showing off the pants.  They are a bit big on her.
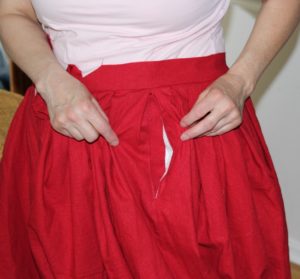
Neat pocket detail
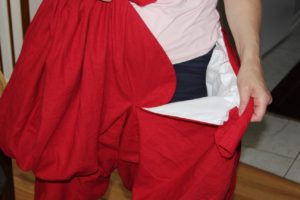
Funky fly flap

Someone more appropriately sized for this mock up, showing off how poofy they are.  I think they look fab!

The green doublet is proceeding along well.
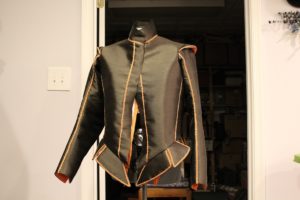
Not the most flattering picture, but you can see the finger woven trim and the tangerine lining at the sleeves :).

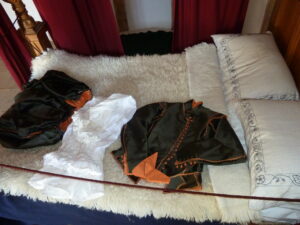


Some more on that shirt…

Hey, boys and girls, it’s been an intense time here at Casa Mellin, as I’ve been logging 11-hour workdays to get the ruffs done by our due date.

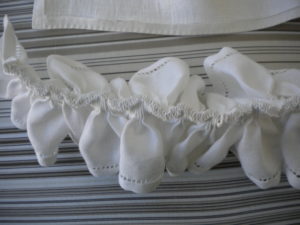
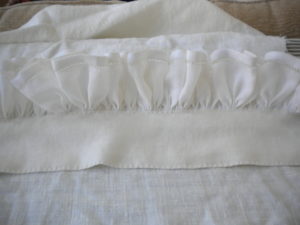
Wanted to show some more pics of the gathered shirt:

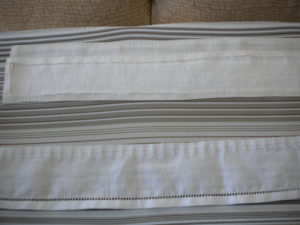
These pictures show the way the ruffles are gathered into the cuffs and collar.  On the original I’m working from (a Swedish shirt from the 1570s or so), the gathering is done with three lines of 1/8″ stitches that are then pulled tight.  Since the linen I’m working with is thicker than the original linen (I can’t find anything that fine that we can afford), I switched to 1/4″ gathers for the neck ruffle.  When the three lines are pulled tight, you see what happens above; the gathers are much firmer and hold their shape much better.  These gathers are then stitched (with one stitch to each pleat) into the cuffs and collar, working first on one side, then the other.  The end result is a fine ruffle that would have been set into shape with starch, but looks pretty nice even without it:

I’ll post pics of the finished shirt once I’ve taken photos.

All the Trimmings

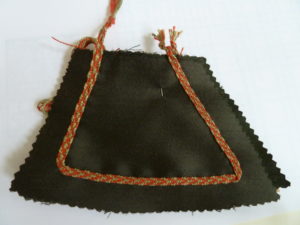
 A week ago Carla and Sandy started putting the hand braided trim on the tabs for the green Wool-silk suit.

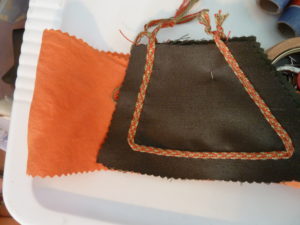
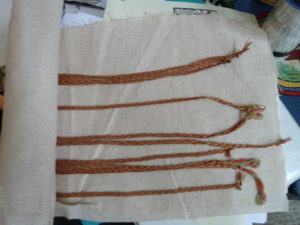
The trim is created using a technique called fingerloop braiding, using five bowes, or loops of silk thread, to create a flat braid. A length of trim is then applied to each individual skirting tab for the doublet prior to assembly and lining.

Speaking of lining, Sandy and Carla also had a heck of a time finding the right lining material in the right color. So after several tests and several dye baths later, they have hand dyed the silk that will be used to line the green wool-silk doublet. The tangerine makes a great contrast and will be well suited for the Governor of Jamestown.


Silk lining with trimmed tab, and lengths of braided trim.

Quick look at buttons


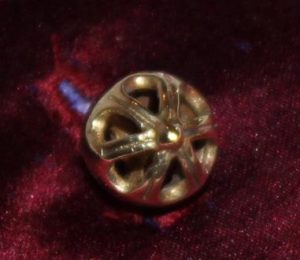
The buttons we are using for the burgundy silk suit. Pay no attention to the buttonhole, as it was done by machine. We’ll be doing the buttonholes by hand on the suit. Buttons were cast by Richard Lanni (Bucklecastings.com) and gilding was done by Lesley Wilson at Darkwood Armory.

Shirt Progress

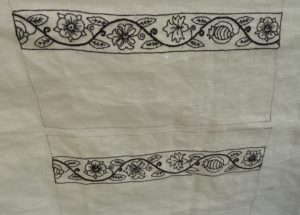
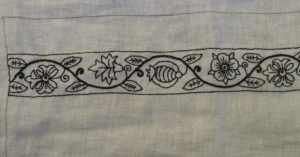
Laura and Vic are making impressive strides on the creation of the shirts to go with the Governor’s new suits for Jamestown. Laura has completed one shirt, and is working on a drawnwork ruff and cuffs to go with it. Vic has completed the embroidery for the cuffs and collar of the other shirt and will soon begin assembly of the shirt with openwork seams.

Laura displays the length of one drawnwork cuff at 2.5 yards.

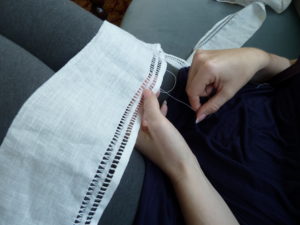
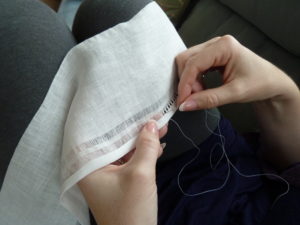
Here are some more views of Laura’s work on the drawnwork cuffs and ruff, close ups of her stitching and the resulting pattern. Click on the small images for a larger view.

Completed drawnwork pattern
Laura works on the second row of drawn work on the edge of a cuff
Laura starting on the first row of drawnwork on the second cuff

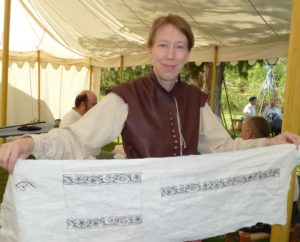
Vic brought the cuffs and collar of the embroidered shirt to share.

Vic displays the embroidered cuffs and collar
Embroidered Cuffs
Embroidered collar detail